

Materials List:
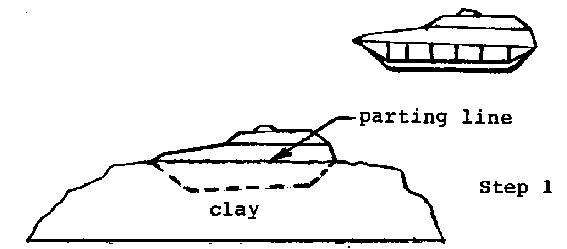
1. Imbed the model in modeling clay up to the parting line. Leave bumps and hollows in the surrounding clay to allow the completed mold halves to interlock.
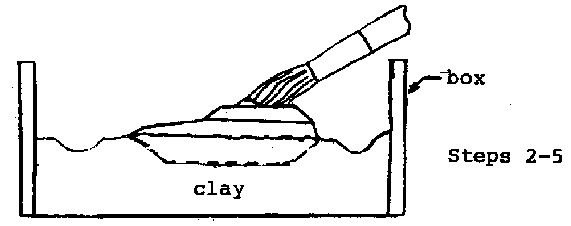
2. Make a box out of cardboard as a form for the mold. Allow about 1/2" of space around the model except where the funnel is to be. Allow 3/4" to 1" on that side.
3. Shape a half funnel out of clay. This can be skipped if you choose to cut it out of the completed mold later.
4. Add any vents using pieces of wire.
5. Apply thinned petroleum jelly to the model. Allow it to dry.
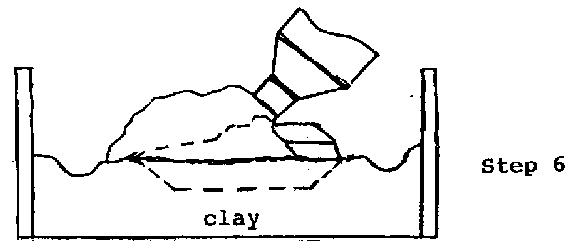
6. Apply a thin layer (no more than 1/8"thick) of silicone sealant to the model. Do one small area at a time. Work it into all areas with a small tool. Allow it to cure overnight. If a thicker mold is desired, additional layers may be added but allow sufficient curing time for each.
7. Apply petroleum jelly to the inside of the box. Mix and pour the plaster-of-Paris backing. Allow it to set (about l hour).
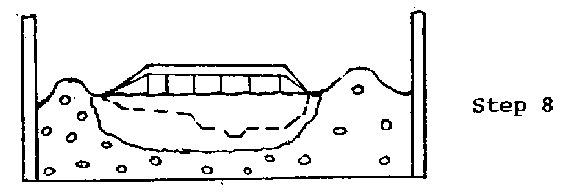
8. Remove the box and the modeling clay. Invert the completed mold half and reassemble the box around it. Complete the clay funnel.
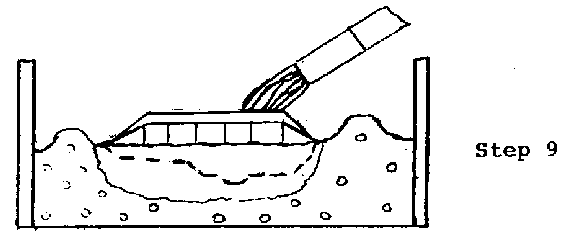
9. Apply thinned petroleum jelly to the model and the normal to everything else. Allow the model to dry.
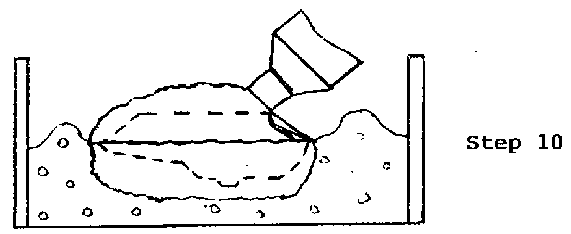
10. Apply sealant as in step #6.
11. Pour the plaster as in step #7.
12. Remove the box. Carefully separate the mold halves. The silicone sealant sections will most likely stick to the model rather than the plaster. Carefully separate the cured sealant from the model. It should not be permanently stuck. Press it back into its plaster backing. Cut the funnel opening now using a sharp knife. Allow the completed mold to cure for a day or two before casting.
When making a small mold, it is often easiest to apply the silicone before assembling the box. The only possible problem might be in making the vents. This is solved by using very short pieces of wire. They need only extend through the silicone. The vent part extending through the plaster can be easily cut out later.
(Two Part Mold) , (Two Part RTV Silicone Mold) , (Table of Contents)